
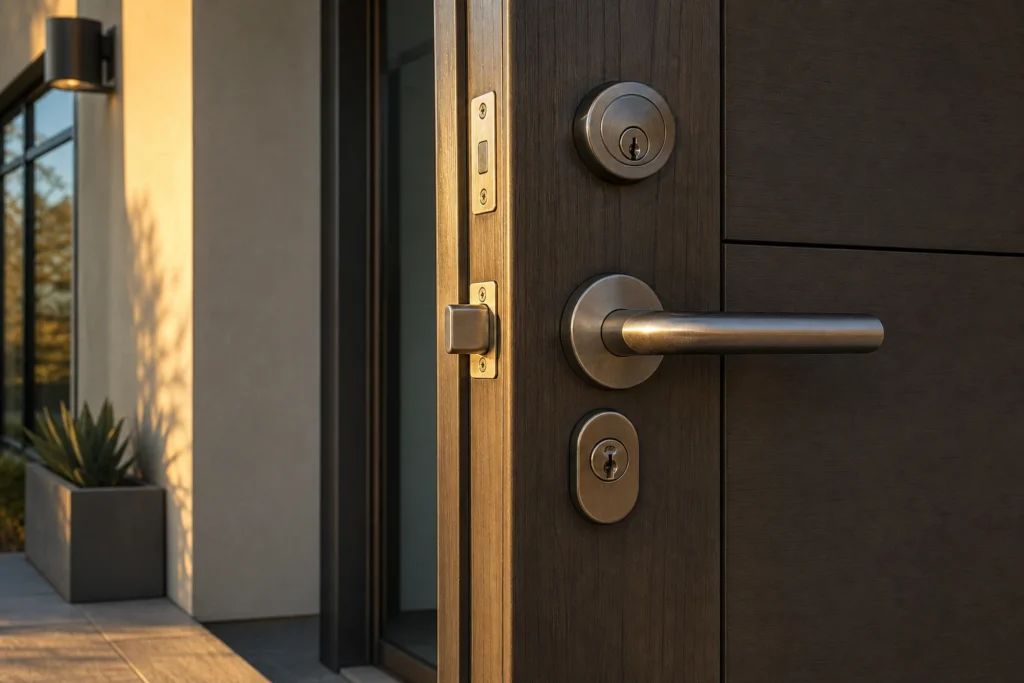
Before you pay, run this quick on-site acceptance to confirm the work matches the agreed scope, get it documented in writing, and protect your warranty and safety.
At-a-glance 12-point acceptance checklist you can run in under 10 minutes
- Home 1: Deadbolt throw. Pass if the bolt projects about 1 inch and seats cleanly in the strike without lifting the handle or forcing the door; 1 inch is a general guideline and local codes or hardware specs may differ. Fail if the bolt scrapes or stalls. (Deadbolt throw is how far the bolt extends; the strike is the metal plate in the frame.)
- Home 2: Latch and strike alignment. Pass if the door latches with a normal push and the latch tongue lands centered in the strike. Fail if you must lift, slam, or pull to catch. (The latch tongue is the spring-loaded piece that clicks into the strike.)
- Home 3: Key operation both sides. Pass if the key inserts fully and turns smoothly clockwise and counterclockwise. Fail if you need to jiggle, back off pressure, or the key binds.
- Home 4: Smart lock basics. Pass if you are the admin, default codes are removed, you can add and remove a user code, the app controls the lock on-site, batteries show healthy, and the inside thumbturn still retracts the bolt freely. Fail if any one of these stalls; also check your model’s manual for features and troubleshooting unique to that device. (The thumbturn is the interior knob that locks and unlocks without a key.)
- Auto 5: Remote functions. Pass if lock, unlock, trunk, panic, and remote start if equipped respond. Fail if any button is dead or intermittent. (Use a fresh fob battery if response is weak.)
- Auto 6: Mechanical and ignition. Pass if the blade turns every cylinder it is meant to, and the immobilizer starts the car without warning lights; note some vehicles need extra programming steps or restrict manual key use because of security features. Fail if you need extra force or see a security indicator. (The immobilizer is the anti-theft system that authorizes the key to start.)
- Auto 7: Lost key disable. Pass if previously lost keys are removed from memory when the vehicle supports it; ask the tech to show the key count. Fail if unknown or unchanged.
- Auto 8: Dashboard status. Pass if no new warning lights remain after programming. Fail if any new fault appears.
- Business 9: Admin control. Pass if full admin credentials are transferred to you, default passwords removed, and you can add a user and assign a role. Fail if the vendor remains the sole admin. (Admin control means you can manage users, schedules, and settings without the vendor.)
- Business 10: Schedules and live tests. Pass if door schedules you set take effect immediately and readers grant or deny access as expected. Fail if schedule changes do not stick. (A reader is the device that reads cards, fobs, or PINs.)
- Business 11: Egress and hardware health. Pass if panic hardware or request-to-exit works, free egress is never blocked, and the closer sweep and latch speeds shut the door reliably without slamming. Fail if any exit requires a key or unusual force. (Free egress means anyone inside can leave quickly and easily without a key, code, or special knowledge.)
- Business 12: Backup power. Pass if the UPS or battery backup runs the system briefly, then restores cleanly. Fail if a power blip knocks devices offline. (A UPS is an uninterruptible power supply that keeps systems up during short outages.)
How to run this on-site without slowing anyone down
Do it at the door or curb with a phone and a flashlight. You run the user actions while the technician observes and adjusts, because you will be the one using the system daily. If any item fails, pause payment and ask for remediation on the spot, then re-test the exact action that failed. Keep it simple and specific: “The deadbolt throws short and scratches the strike. Please adjust the alignment and re-test.” Tight, objective language avoids misinterpretation and helps the tech resolve the issue quickly.
Proof of authorization speeds everything up and is critical to legal compliance and trust. For homes, bring government ID that matches the address, or a deed, closing statement, or lease plus ID; tenants may also need the property manager’s approval. For vehicles, bring your ID, the registration with matching VIN, and insurance card; some platforms will also request the title or bill of sale. For businesses, bring your ID plus written authorization on company letterhead or a work order, and be prepared to show a lease, property management contact, or business card that matches the site. If you have questions about what will be required, ask ahead so the right documents are ready at the door.
Capture quick evidence so any future questions are easy to resolve. Photograph the strike and bolt fully extended, closer label and arm position, keypad settings or admin screen, and, in vehicles, a clean dashboard after programming. A short video of each pass or fail reduces back-and-forth later if symptoms return. Store these with your signed report and invoice so warranty conversations start with facts, not guesses.
Home acceptance: make sure both the metal and the software behave
Start with mechanical action and alignment before you look at software. A good deadbolt throws smoothly and retracts with the key and thumbturn, and the bolt should fully enter the strike without dragging. If the bolt drags or marks the strike, ask for a strike adjustment or minor hinge shim to center the bolt path. If the key binds, a rekey may solve worn pin stacks without replacing good hardware. Rekey means the locksmith changes the lock’s internal pins to work with a new key while keeping the existing lock body, whereas replace means swapping the entire lock or cylinder with new hardware.
Run a smart lock sanity check when electronics are involved. You should leave as the admin, with factory codes removed and at least one test user code you can add, use, and delete on command. Confirm on-site app control, healthy batteries, and that the inside thumbturn still retracts the bolt freely for safety. If pairing or app control struggles, ask for a reset and fresh onboarding before you pay, and note that you should consult your specific model’s manual for unique features, supported integrations, and troubleshooting steps. Free interior operation without a key remains nonnegotiable even when the app is offline.
Auto acceptance: verify every function curbside
Work through the fob in order: lock, unlock, trunk, panic, then remote start if equipped, and confirm each action from reasonable distances. Insert the emergency blade anywhere it belongs and turn it gently; no extra force should be needed, and the ignition should start without a security or immobilizer warning. If you replaced a lost key, ask whether the platform supports disabling old keys and request a key-count check so only your current keys remain authorized. One function failing usually points to a single fix, so identify it clearly and ask the tech to reprogram or reseat the battery now while you can retest on-site.
Expect a few edge cases by make, model, and year. Some vehicles require an additional immobilizer learn procedure, proximity key syncing, or a drive cycle before all features settle, and certain models limit or delete external key cylinders entirely for security. Others may start on a programmed chip but still need a second step for remote functions to work, which the technician can complete while you test. If a dashboard warning appears after programming, have it addressed immediately and cleared before you leave. Ask the technician to label any spare keys and explain any temporary behaviors that resolve after the final programming step.
Business acceptance: take ownership of access and life safety
Stand with the technician and complete a full admin owner transfer. Remove default passwords, change any temporary credentials, and verify that you can add a user, assign a role, and apply an access schedule yourself while watching events log in real time. Export or capture screenshots of user lists, schedules, controller settings, and license details so your records reflect the system at handover. Confirm that vendor accounts no longer hold sole admin rights and document who on your team will manage day-to-day administration and audits.
Next, walk the doors from both sides and validate safe operation. Test panic hardware or request-to-exit devices from the inside and confirm free egress at all times without keys, codes, or unusual force, then watch the closer sweep and latch speeds so doors shut reliably without slamming. If a backup power unit is present, request a short failover to battery or UPS, verify readers and locks stay online, and confirm a clean return to mains power. Note any ADA, IBC, or NFPA concerns to follow up with your code officials and ask for a written summary of any items deferred for a subsequent visit.
Close-out: collect handover items, audit the invoice, and set reminders
Before payment, gather deliverables in one place: counted keys, any restricted key authorization forms, a keying schedule or bitting card if applicable, programming receipts, exported event logs, admin credentials now in your control, and written warranty terms. Ask for a signed service report summarizing the work, methods used, and parts installed; this report is the formal record used for invoicing and any warranty disputes, and clear documentation helps avoid the kinds of mistakes that lead to future conflict. If you cannot collect every item on the spot, schedule a quick follow-up by email for the missing files or signatures and set a reminder to confirm receipt.
Do a quick invoice audit before you approve payment. The line items should match the scope you approved, with parts, labor, and any trip or programming fees itemized. Red flags to stop and question include unauthorized drilling, vague “service” lines, or totals that do not match the agreed plan. If something is unclear, ask the technician to annotate the report so the invoice reflects exactly what was done and why.
For related details, review Restricted Keys and Key Control for Georgia Businesses: Stop Unauthorized Copies Without Constant and Are Double‑Cylinder Deadbolts Legal in Georgia? Egress, Fire Code, and Safer Alternatives for Homes.
Start key and code control immediately to keep security tight once the tech leaves. Log who has which keys or codes, how future duplicates will be approved, and where spares will live. Set maintenance reminders: smart lock batteries every 6 to 12 months, light lubrication annually for mechanical locks, and a rekey prompt after turnover events like moves or staff changes. To get a printable version of this acceptance checklist with signature fields and a key or code handover log, email info@lionguardlocksmith.com and we will send it over.